
The default WordPress gallery works, but it’s basic. Images crop into a stiff grid, there’s no proper lightbox, and a page with 80 photos can load slowly.
A smarter gallery handles those problems for you. It arranges photos of different sizes into clean rows, opens them in a lightbox, loads images only when needed, and adds a Load More button instead of dumping everything at once.
In this guide, you’ll learn how to create a photo gallery in WordPress with ShapedGallery, a free plugin by ShapedPlugin. We’ll build one from a ready-made pattern first, then from scratch, and finally as a reusable gallery you can place anywhere with a shortcode.
What is ShapedGallery?
ShapedGallery is a gallery builder for the WordPress block editor. You add one ShapedGallery block, choose a layout, pick your images, and adjust settings in the sidebar.
What makes it “smart” in the free version:
- Automatic Justified layout: fits photos of different shapes into even rows without heavy cropping
- Grid and Masonry layouts for uniform or Pinterest-style galleries
- Built-in lightbox with zoom, pinch and swipe, keyboard arrows and an image counter
- Output caching so large galleries load faster
- Ajax Load More to show photos in batches
- Titles and descriptions pulled from your Media Library data
- Hide on device, plus public, private or password-protected galleries
- Ready Patterns you can insert in one click
- Elements for Elementor, Divi, Bricks, Oxygen, Beaver Builder and WPBakery
Some features are part of ShapedGallery Pro, including extra layouts (such as Perspective), category filters and search, watermarks, image protection, and motion effects. We’ll stick to free features in this tutorial.
What you need before you start
- WordPress 6.8 or later
- PHP 8.1 or later (check under Tools > Site Health > Info > Server)
- The block editor. You build galleries there, even if your pages use a page builder
- Your photos, ideally resized to around 2000 px on the long side before upload
Tip: Fill in each photo’s Alt Text and Caption in the Media Library before you build. The gallery can display titles and descriptions from that data, and alt text helps both accessibility and image search.
Step 1: Install and activate ShapedGallery
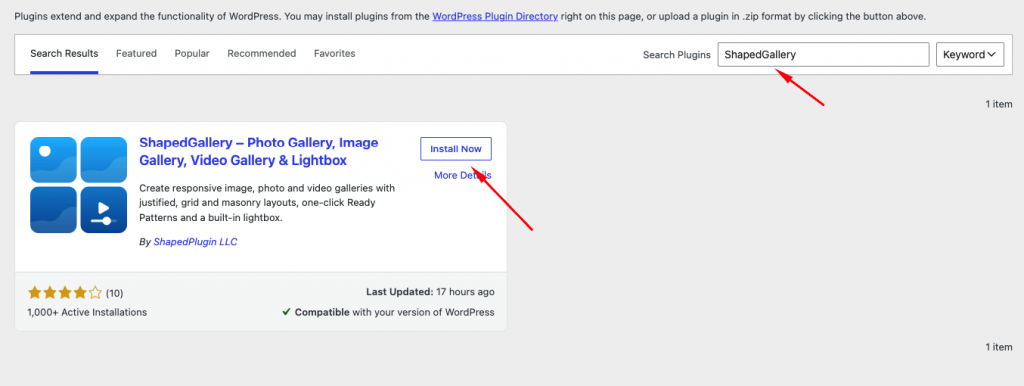
- Go to Plugins > Add New Plugin.
- Search for ShapedGallery.
- Click Install Now on the plugin by ShapedPlugin LLC, then Activate.
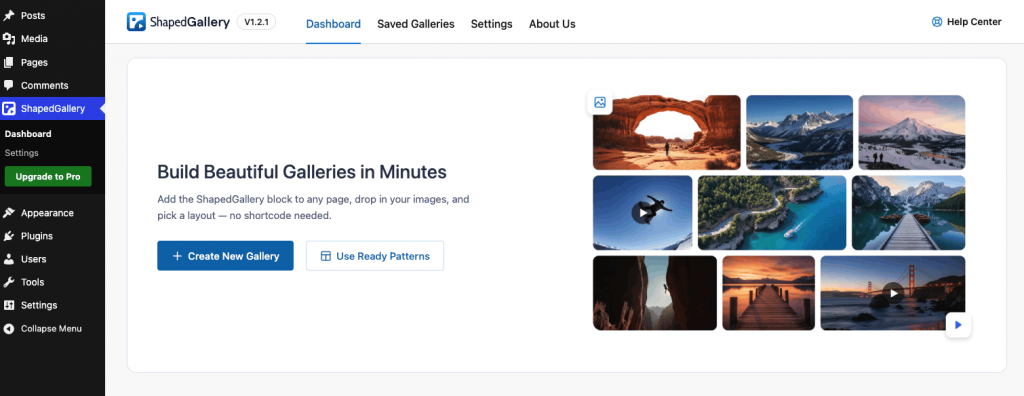
A new ShapedGallery menu appears in your dashboard, with Dashboard, Saved Galleries and Settings.
Method 1: Start from a Ready Pattern (fastest)
A Ready Pattern is a pre-built gallery: the layout and settings are done, with placeholder images. You swap in your own photos and publish. It’s the quickest way to get a polished result.
Step 2: Open the Ready Patterns Library
- Open the page where the gallery should go (or Pages > Add New).
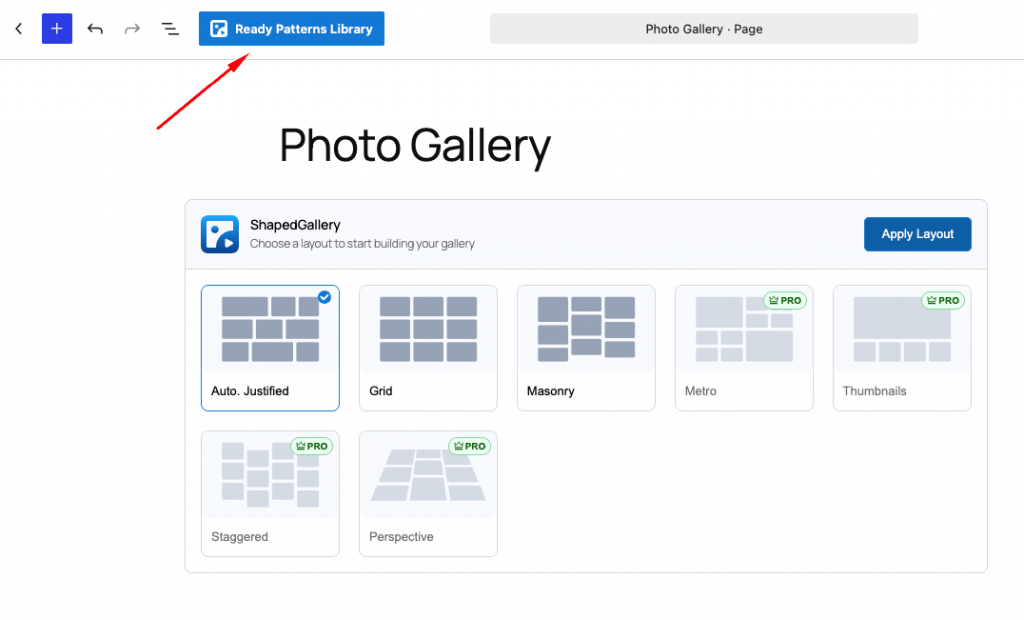
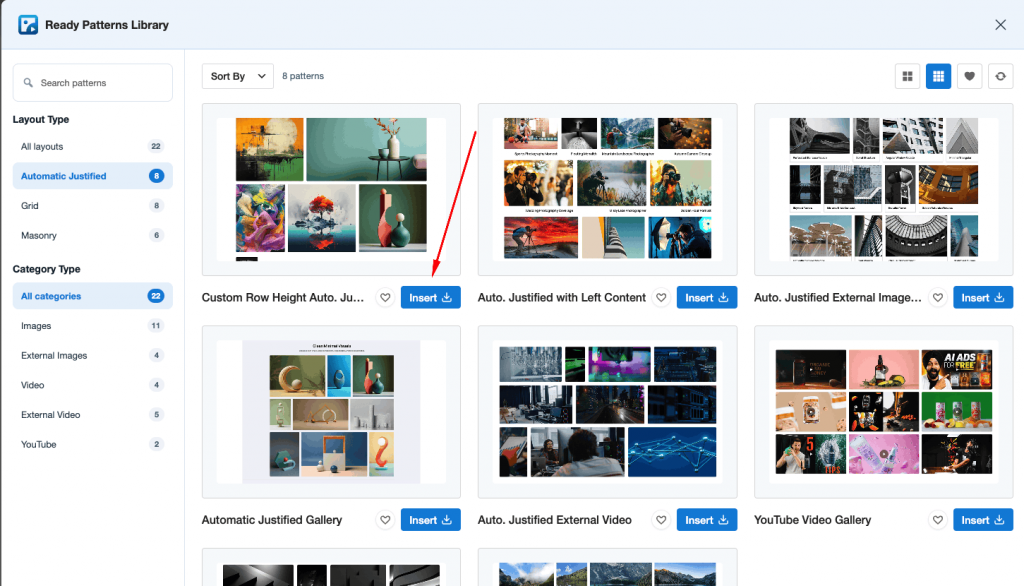
- Click Ready Patterns Library in the editor’s top bar.
You can also go to ShapedGallery > Dashboard and click Use Ready Patterns. That opens a new page with the library already open.
Step 3: Choose and insert a free pattern
- Browse by layout in the left sidebar, or use search.
- Click a card to preview it. Free patterns have no Pro badge.
- Click the Insert button on the card. The pattern is added to your page.
Step 4: Replace the placeholder images with your photos
- Select the gallery block and click Edit Gallery in the block toolbar.
- Remove the placeholder images.
- Click Add to Gallery, select your photos, and click the Add to Gallery button.
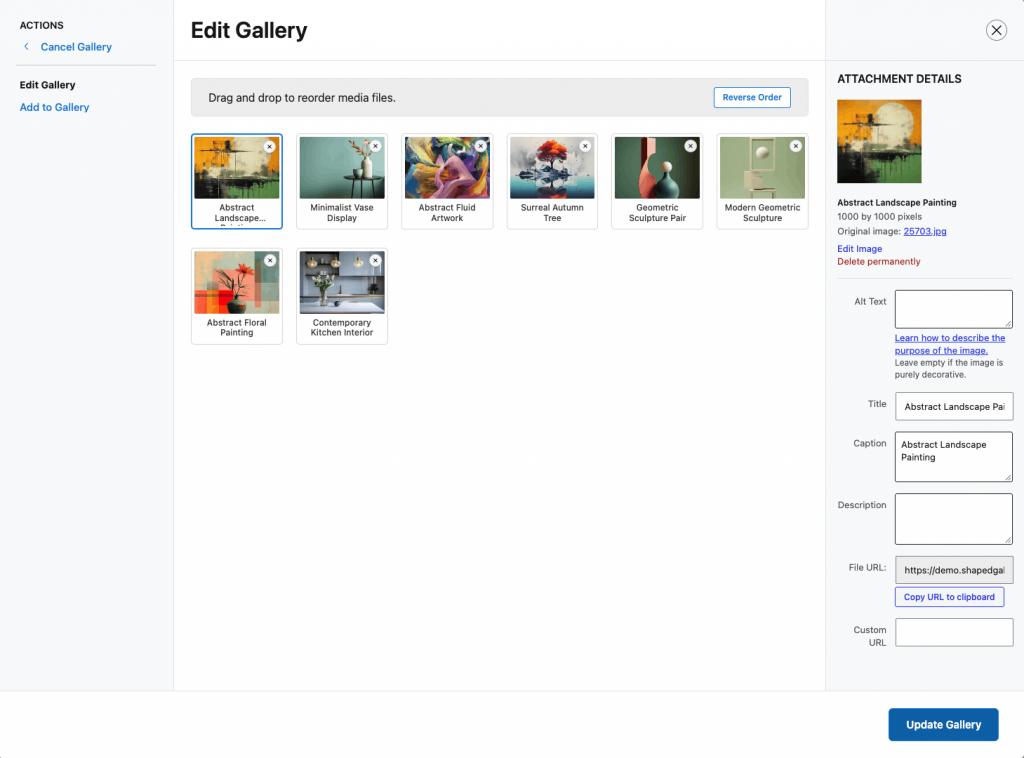
The imported pattern is a normal ShapedGallery block, so every setting stays editable.
Method 2: Build a gallery from scratch
Use this method when you want full control from the start.
Step 2: Add the ShapedGallery block
- In the page editor, click + (Add Block).
- Search for ShapedGallery and insert it.
There’s one block for every layout, so you won’t need to hunt through several similar blocks.
Step 3: Pick a layout
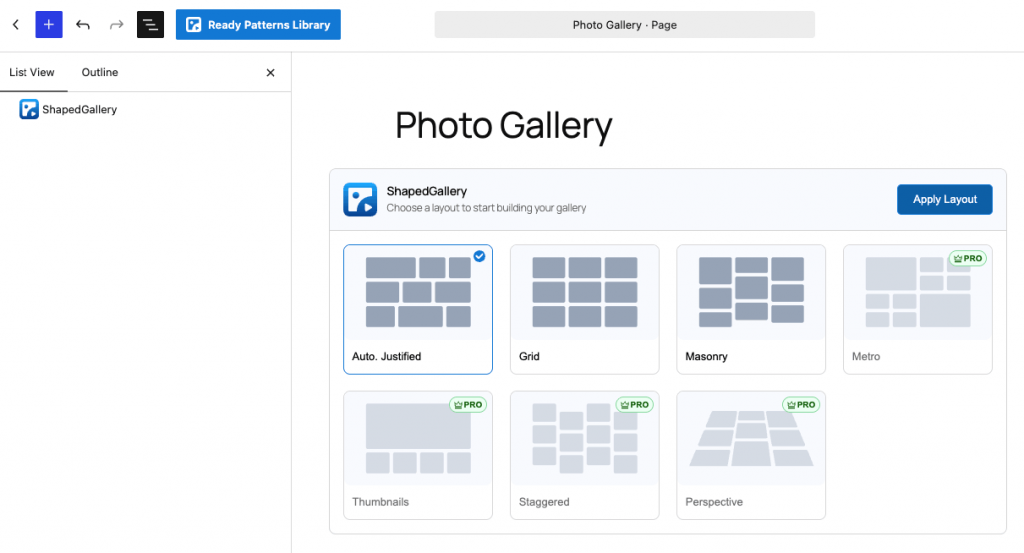
The block opens with a layout picker. For a first gallery, choose Automatic Justified.
Which free layout to use:
| Layout | Best for | Watch out for |
|---|---|---|
| Automatic Justified | Mixed portrait and landscape photos; travel, events, portfolios | The last row won’t always fill the full width |
| Grid | Products, team photos, anything that should look uniform | Images are cropped to equal sizes |
| Masonry | Photos with varied heights; inspiration boards | Order reads in columns, which can feel less linear |
Step 4: Add your photos
- Choose Images from the left rail, then select photos from your Media Library or upload new ones with Select Files.
- Click the Create a New Gallery button.
To reorder photos or edit details, click Edit Gallery in the block toolbar. You can drag images, reverse the order, and edit each photo’s alt text, title, and caption.
Step 5: Adjust layout and image settings
Select the block and open the settings sidebar. Start with these:
- Layout Settings: set the gap between images and the number of columns (Grid, Masonry) or the row height (Justified).
- Image & Video Settings > Resolution: Large is a good balance of sharpness and speed. Full loads original files and can slow pages down.
Step 6: Set up the lightbox
Open the Image Click Action panel:
- Click Action Type: choose Lightbox.
- Lightbox Click Action: choose Full Image so visitors can click anywhere on a photo. The icon makes only a small badge clickable, which many people miss.
Step 7: Add Load More for large galleries
If you have more than 20 or so photos, turn on Ajax Pagination and use the Load More button. Set Show Per View to how many photos load first (the default is 15). The page opens faster, and visitors load more only if they want to.
Step 8: Publish and test
Click Publish, then open the page. Check that:
- Photos load and fit cleanly
- Clicking a photo opens the lightbox, and arrow keys move between images
- Load More adds the next batch
- The gallery looks right on a phone (swipe through the lightbox too)
Method 3: Create a reusable gallery with a shortcode
Galleries built inside a page belong to that page. If you want one gallery on several pages, or inside a page builder or widget, make it reusable.
- Go to ShapedGallery > Saved Galleries > click Create a Saved Gallery. The editor opens with the gallery block ready.
- Build the gallery as in Method 2, give it a title, and click Publish.
- Copy the shortcode from ShapedGallery > Saved Galleries (Shortcode column). It looks like this:
[shaped_gallery id="123"]- Paste it into any page, post, widget, or page builder text area.
Edit the saved gallery once, and every page that uses its shortcode updates. Using Elementor? ShapedGallery adds its own element there. For Divi, Bricks, Oxygen, Beaver Builder, or WPBakery, turn the element on under ShapedGallery > Settings > Integrations first.
FAQ
Is ShapedGallery free? Yes. The free plugin is on WordPress.org. ShapedGallery Pro adds more layouts, filters, watermarks, and more patterns.
Can I add videos to the gallery? Yes. The free version supports Media Library videos, external video URLs, and YouTube.
Does it work with Elementor or Divi? Yes. It includes elements for Elementor, Divi, Bricks, Oxygen, Beaver Builder and WPBakery. Only Elementor is on by default.
Will a large gallery slow down my site? Less than you might expect. Caching and Load More help a lot. Image file size still matters, so resize photos before uploading.
Wrapping up
A good gallery should show off your photos, not fight them. With ShapedGallery, you can drop in a Ready Pattern and swap photos in a few minutes, or build a custom justified gallery with a lightbox and Load More, all without paying.
Download ShapedGallery from WordPress.org and browse the free Ready Patterns for ideas. Want more free block plugins? See our list of the best Gutenberg block plugins.
Leave a Reply